Product
Simplified Editor (Web-based CL PDF)
Feature
Tables
Document Element
- Table Structure Accuracy
- Header Cell Accuracy
- Assigning Header Cells
Issue
A table in your document has header cells that are either missing or incorrectly assigned. This means the table will not be tagged with the correct structure in the final accessible PDF output.
Symptom
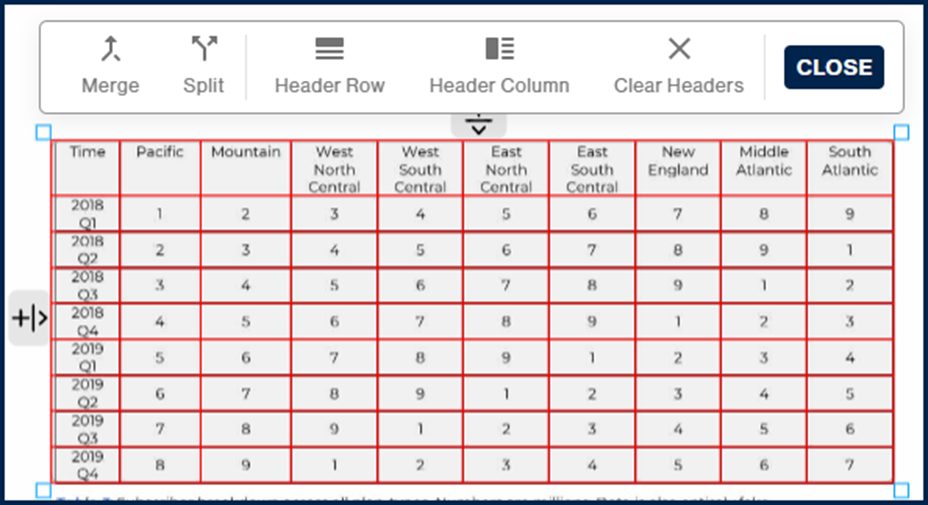
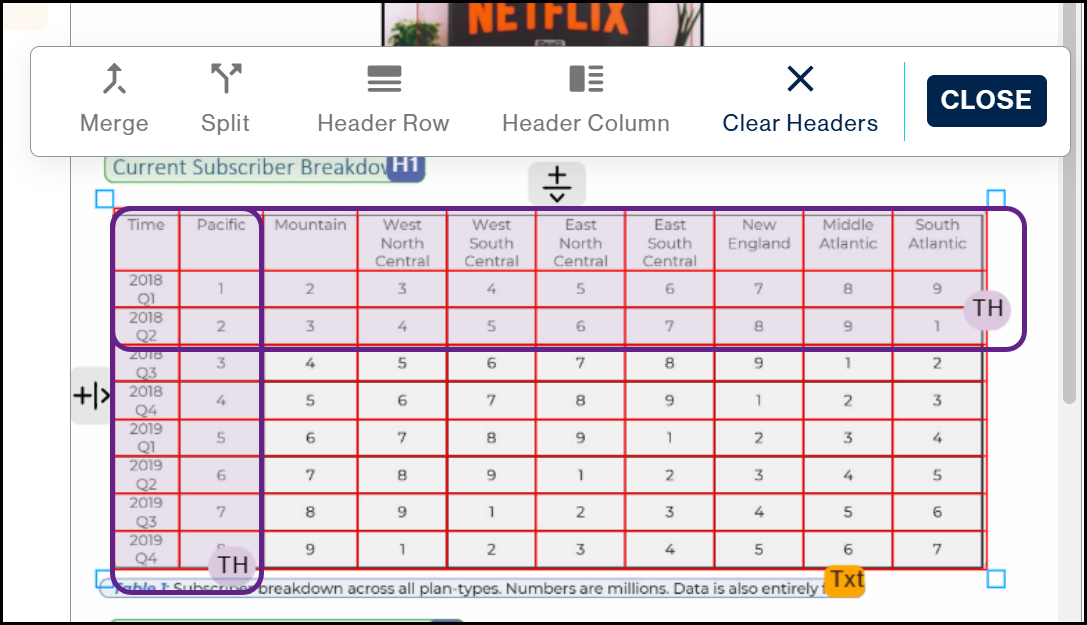
When you select your Table element and click the "Table" button in the toolbar, one of the following is true:
- No "TH" indicators appear anywhere in the table, meaning no header cells have been assigned at all.
- "TH" indicators appear, but they are on the wrong row or column, meaning headers have been assigned incorrectly.
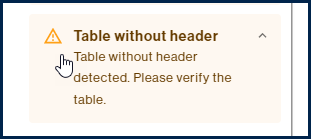
- You may also see a warning on the left side of the interface during the Clarify Page Elements step, indicating that a table has been detected without any headers.
Causes
The Simplified Editor attempts to detect header cells automatically, but it does not always get this right. Complex table formatting, inconsistent styling in the source document, or tables without clearly defined header rows or columns can all cause headers to be missed or misassigned.
Affected Users
Screen reader users are most directly affected. Header cells tell a screen reader which column or row a data cell belongs to. Without correctly assigned headers, a user navigating the table will hear data values with no context for what those values mean.
Resolution Steps
Clearing incorrect headers (if needed)
If headers are already assigned but in the wrong place, do this before anything else:
- Select the Table element and click the "Table" button in the toolbar to open the table-specific toolbar.
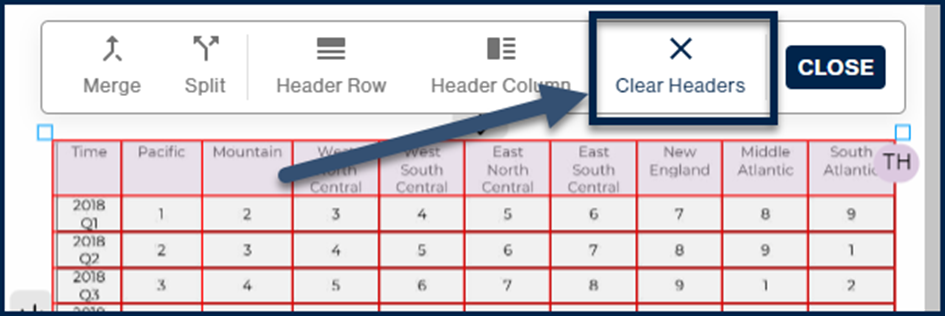
- Click "Clear Headers" in the Table toolbar.
Assigning row headers
If your table has both row headers and column headers, always do this section first.
- Select the Table element and click the "Table" button in the toolbar to open the table toolbar.
- In the page view, click and hold in the first cell of the header column, then drag downward to select all cells in that column.
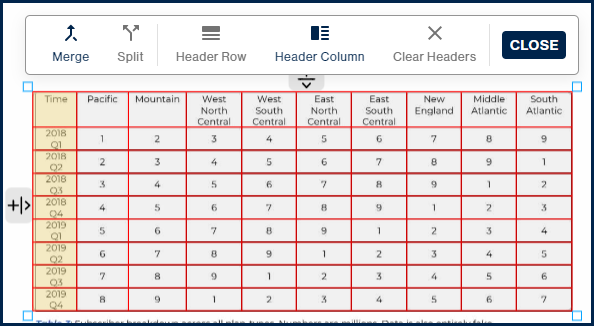
- In the table toolbar, click "Header Column."
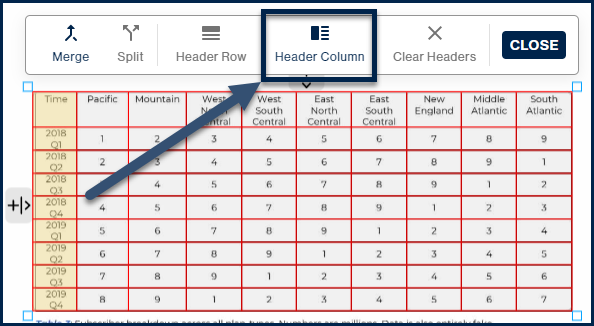
The "TH" indicator will appear at the bottom of that column in the page view.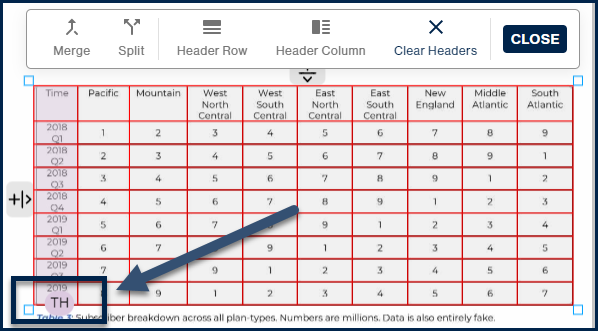
If your table has more than one column of row headers, you can select multiple columns at the same time.
Assigning column headers
- In the page view, click and hold in the first cell of the header row, then drag across to select all cells in that row.
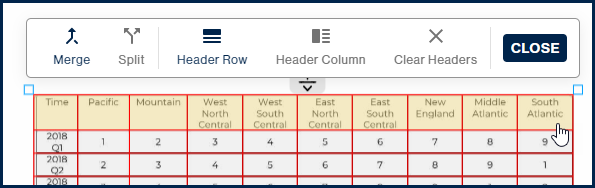
- In the table toolbar, click "Header Row."
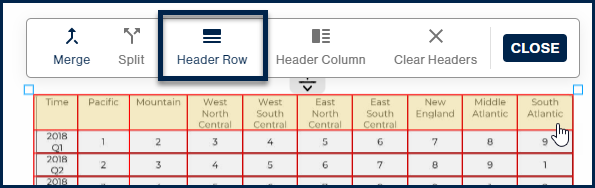
The "TH" indicator will appear on the right side of that row in the page view.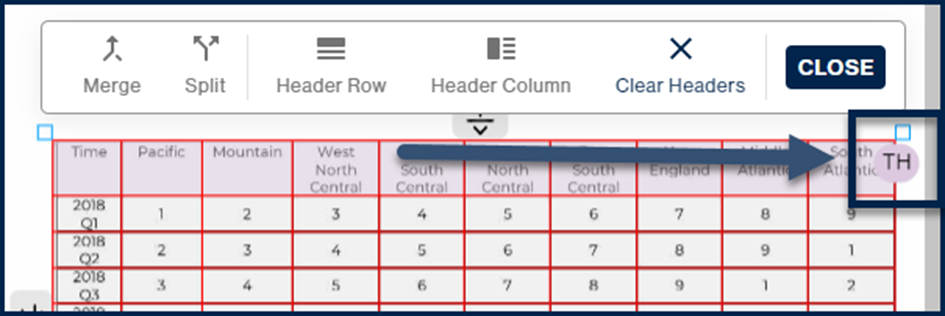
If your table has more than one row of column headers, you can select multiple rows at the same time.
Why the order matters:
If your table has both row headers and column headers, the cell in the top left corner needs to end up as a column header. Assigning a Header Column first and Header Row second ensures that happens automatically. If you do it in reverse order, that top left cell will be marked as a row header instead, which is incorrect.
Verification
After assigning your headers, the "TH" indicators should appear in the correct locations in the page view. Column headers show "TH" on the right side of the header row. Row headers show "TH" at the bottom of the header column. If anything looks off, use "Clear Headers" and go through the resolution steps again.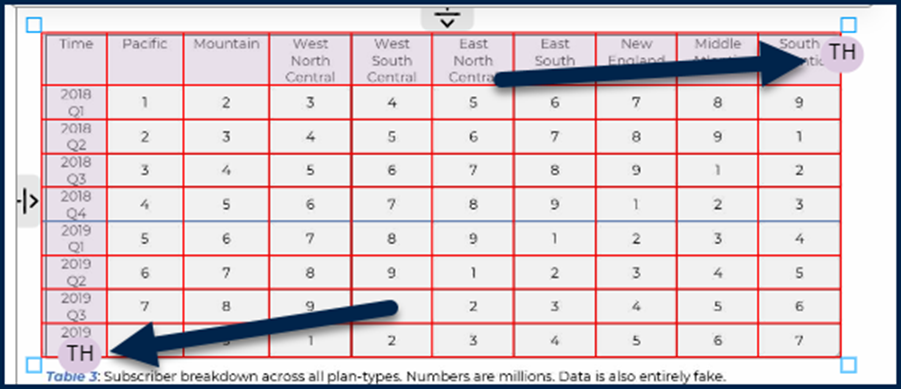
Related Articles
- Verifying and Fixing Data Table Formatting (Simplified Editor)
- How to Properly Mark Tables (Simplified Editor)
- How to Connect Separated Table Elements (Simplified Editor)
Was this article helpful?
That’s Great!
Thank you for your feedback
Sorry! We couldn't be helpful
Thank you for your feedback
Feedback sent
We appreciate your effort and will try to fix the article