Product
Simplified Editor (Web-based CL PDF)
Feature
Tables
Document Element
- Multi-Page Tables
- Multi-Column Tables
- Seperated Tables
Overview
When a data table spans more than one page, the Simplified Editor sees each page as a separate table. In the final accessible PDF, those pieces need to be connected so that assistive technology reads them as one continuous table. Without that connection, a screen reader will treat each page as an entirely different table, which breaks the reading experience for the user.
Prerequisites
Do this any time a data table in your document continues across a page break. You should have already marked each part of the table as a Table element before connecting them. If you have not done that yet, see How to Properly Mark Tables (Simplified Editor). The tables you are connecting must have the same number of columns.
Steps to Follow
There are two methods for connecting tables. Both end with the same connection step in the Full Document Review. Choose the method that works best for your document.
Method 1: Mark each part independently, then connect
Use this when you want to mark each page of the table as its own Table element first and make the connection afterward.
- In Page Elements, mark the table on each page as its own Table element, including any header rows and header columns.
- Complete any additional table fixing, resizing, cell merging, and splitting needed before moving on.
- In the Full Document Review, click the "Connections" button.
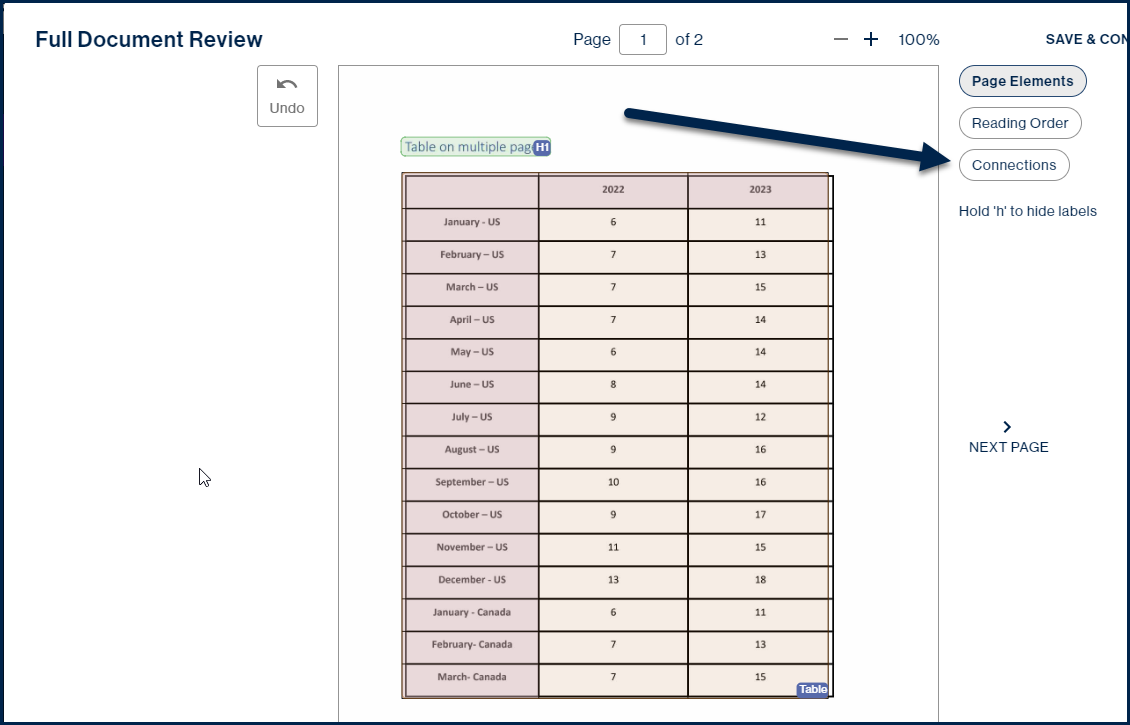
- On the first page of the table, check the box at the lower right corner of the table.
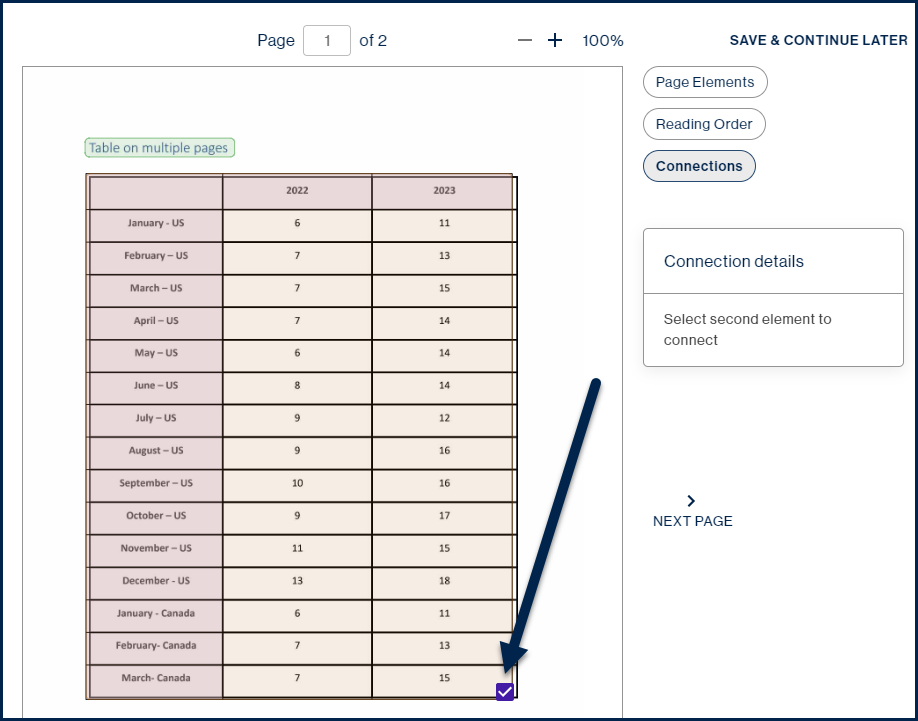
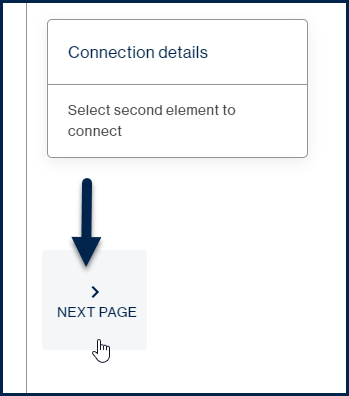
- Click "Next Page" in the Connection Details panel to move to the next page.
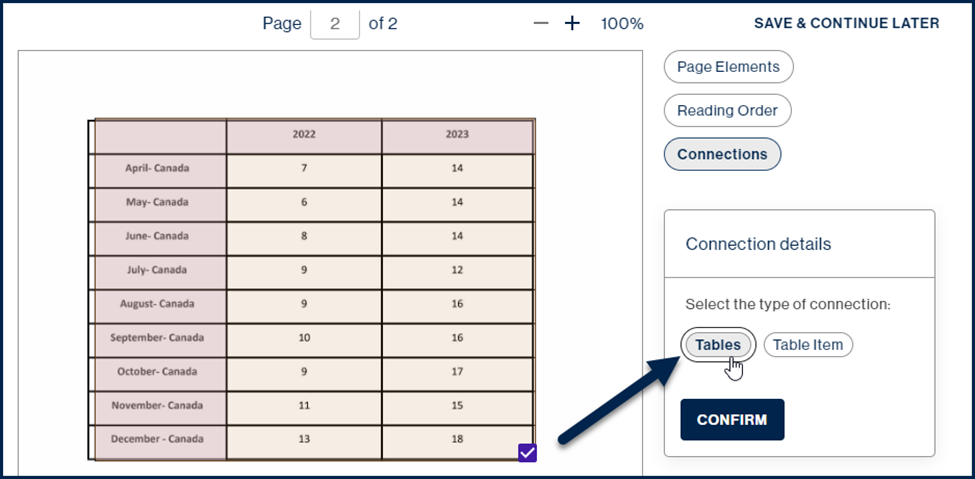
- On the next page, check the checkbox at the lower right corner of the table.
- In the Connection Details panel, select "Tables" and click "Confirm."
After confirming, you will see a blue arrow in the upper left corner of the table on page two, indicating the connection has been made.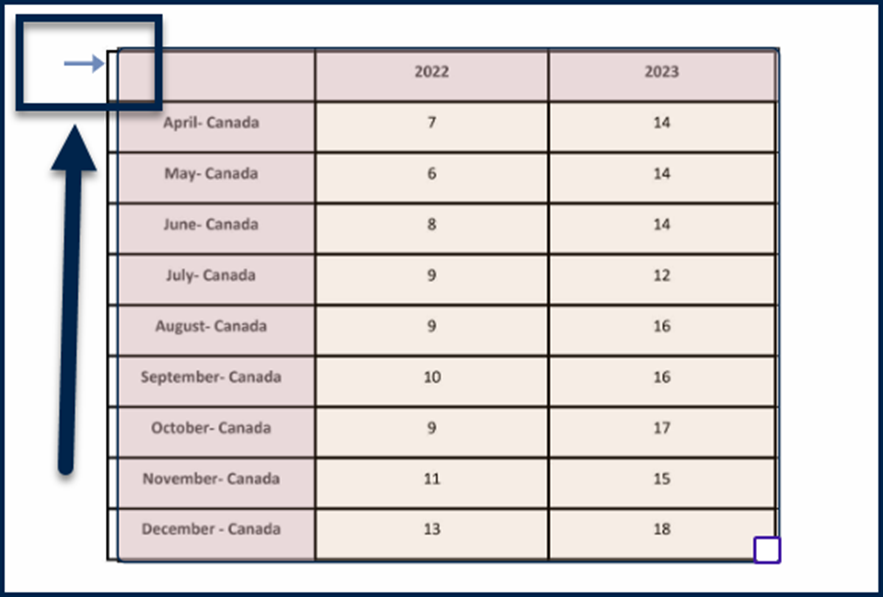
When using this method, you must mark the header row on the second page of the table. If you do not, those cells will be treated as data cells in the final output.
Method 2: Resize the table on the second page, then connect
Use this if you prefer to exclude the repeated header row from the Table element on the second page, rather than marking it as a header row again.
- In Page Elements, mark the table on each page as its own Table element.
- On the second page, resize the Table element so that the repeated header row is not included inside it.
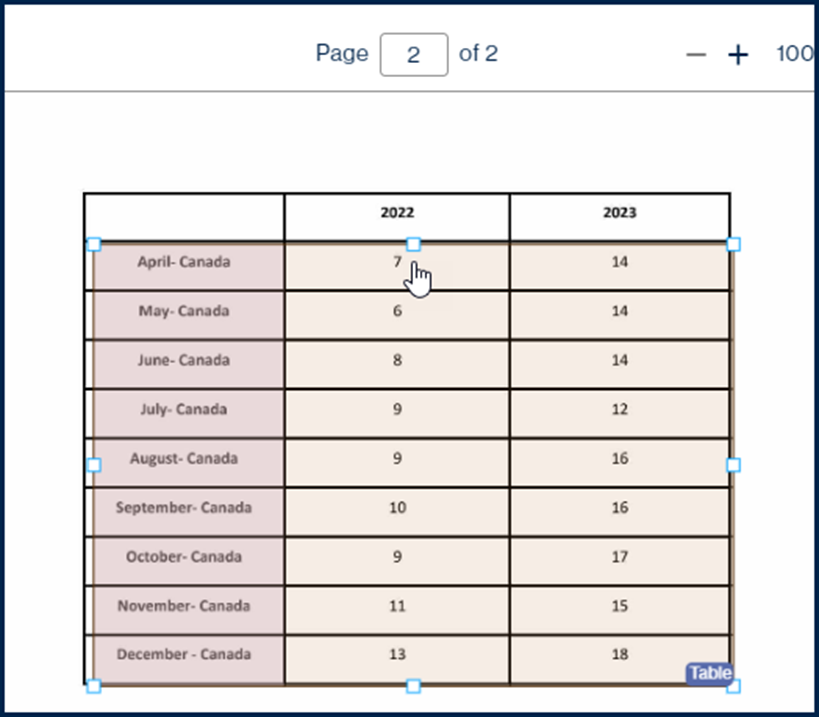
- Mark any header columns as needed.
- Follow steps 3 through 7 from Method 1 above to make the connection in the Full Document Review.
Special Case: A Row Crosses the Page Break
If a single row in your table is split by the page break, the connection works slightly differently. Here is a screenshot of a table with a split row to explore as an example:
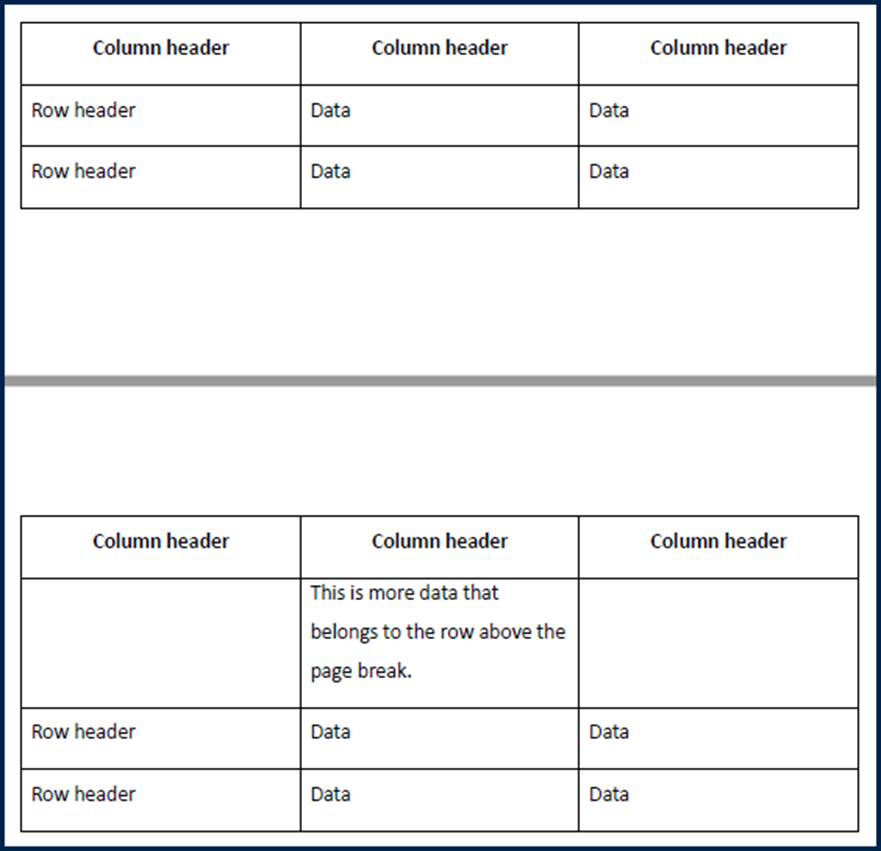
Follow either Method 1 or Method 2 to mark and connect the tables, but in step 7, select "Table Item" instead of "Tables" in the Connection Details panel. This is essentially telling the tool that it's not connecting two entire tables, but rather a specific item (table row) within the table.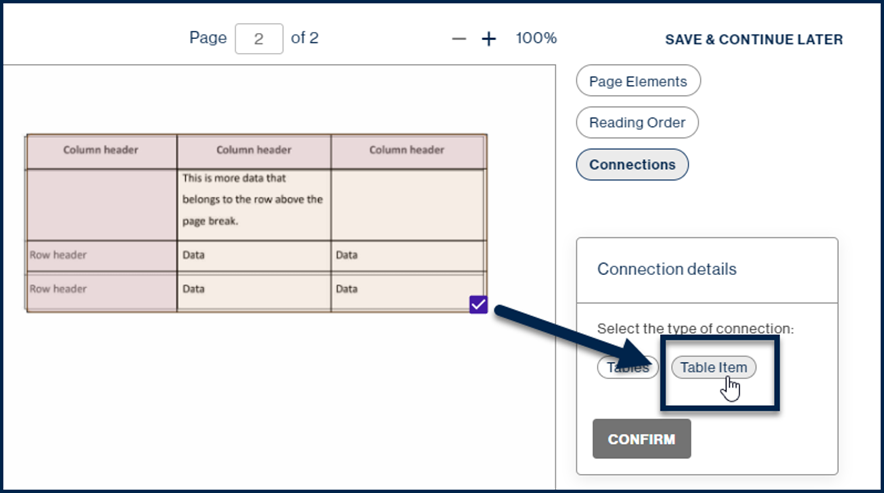
If data cells span across the page break, make sure the row containing those cells is not marked as a header row.
Common Problems
The tables will not connect
The most common reason two tables cannot be connected is that they do not have the same number of columns. Go back and check the column structure on each page before attempting to connect them again.
The connection went through, but the output still looks wrong
If the final table structure is not reading correctly, check whether the header rows are marked correctly on each page. A missing or incorrectly marked header row is the most frequent cause of output issues with connected tables.
Not sure whether to use Method 1 or Method 2
Either method will produce the same result in the final output. Method 1 is generally easier to follow for first-time users. Method 2 can save a step if you find it simpler to resize than to re-mark header rows.
Frequently Asked Questions
Why do the column headers need to repeat visually on each page?
When someone is reading a printed or on-screen document, repeating the column headers on each page means they do not have to flip back to the first page to remember what each column contains. It is a standard authoring practice for any table that spans multiple pages.
Why should the repeated headers not be tagged on the second page?
A screen reader already has access to the header information from the first page of the table. If the headers are tagged again on the second page, some assistive technology will read them twice, which can be confusing. The connection you make in the Simplified Editor ensures the header information carries through without needing to be repeated in the tag structure.
What is the difference between connecting with "Tables" versus "Table Item"?
Use "Tables" when each page contains a complete set of rows with no row split across the page break. Use "Table Item" when a single row in the table continues from one page onto the next. This is essentially telling the tool that it's not connecting two entire tables, but rather a specific item (table row) within the table.
Related Articles
- Verifying and Fixing Data Table Formatting (Simplified Editor)
- How to Properly Mark Tables (Simplified Editor)
- Verifying and Fixing Header Cells in Tables (Simplified Editor)
Was this article helpful?
That’s Great!
Thank you for your feedback
Sorry! We couldn't be helpful
Thank you for your feedback
Feedback sent
We appreciate your effort and will try to fix the article