Product
Simplified Editor (Web-based CL PDF)
Feature
Tables
Document Element
- Table Structure Accuracy
- Table Cell Merging
Issue
A data table in your document is not structured correctly inside the Simplified Editor. The Table element may be too large or too small for the content, or the internal structure of rows, columns, and cells does not match what appears in the physical view of the document.
Symptom
One or more of the following is true when you review your Table element in the Simplified Editor:
- The Table element is cutting off part of the table, or extending beyond it into surrounding content. In short, if the identified table boundary does not match the physical view of the table.
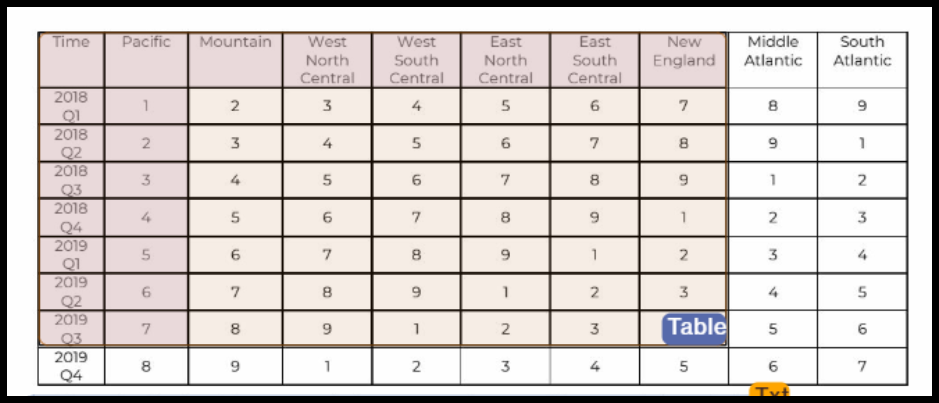
- When you open the table-specific sub-toolbar by clicking the "Table" button, the number of rows or columns shown does not match what you see in the page view.
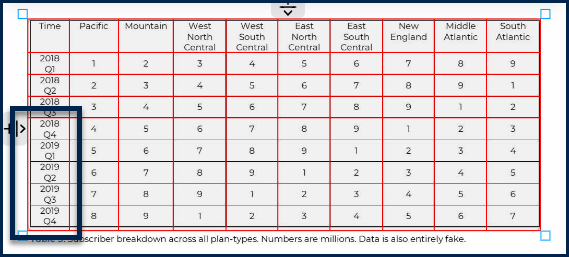
- A word or value that should be in one cell is visually split across two cells by an unexpected dividing line.
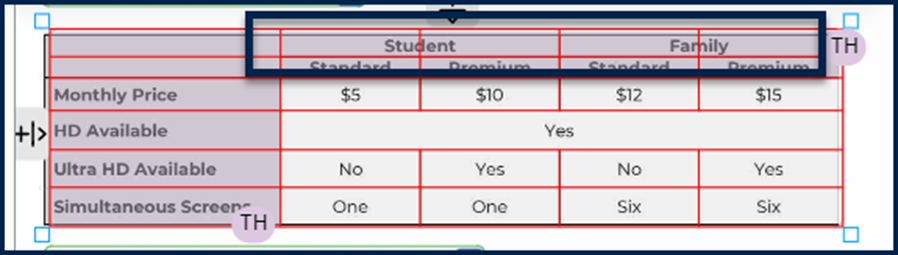
Causes
The Simplified Editor detects table structure automatically based on the formatting of the source document. Inconsistent spacing, merged cells, or unusual formatting in the original file can cause the tool to misread the number of rows or columns, or to split cells that should be combined.
Affected Users
Screen reader users are most directly affected. A screen reader navigates tables cell by cell, announcing the row and column structure as it goes. If rows or columns are missing, duplicated, or cells are incorrectly split, the user will either miss content entirely or hear it read out in a way that does not reflect the actual structure of the table.
Resolution Steps
Resizing the Table element
If the Table element is too large or too small for the content:
- Select the Table element in the page view.
- Drag the edges to resize it so it fits the table content exactly.
If you resize a Table element manually, you must then check the internal row and column structure to make sure it is still correct.
Adding missing rows
If the table toolbar shows fewer rows than the table actually has:
- Select the Table element and click the "Table" button in the toolbar to open the table toolbar.
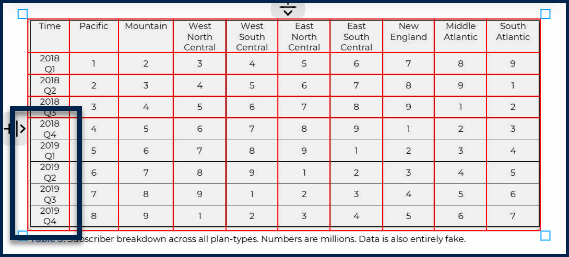
- Near the top of the table, just below the table toolbar, locate the icon showing a horizontal line with a downward arrow.
- Hover over that icon until the resize arrows appear.
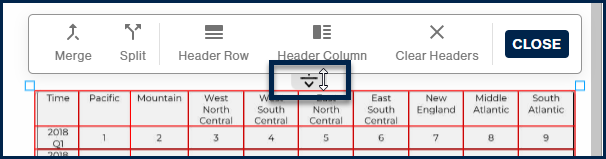
- Click and hold, then drag downward into the table to create a new row separator.
- Drag the separator to the correct position in the table.
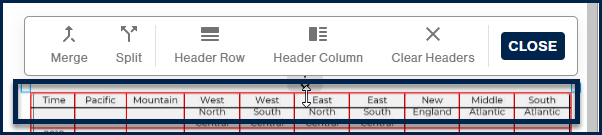
- Repeat until the table has the correct number of rows.
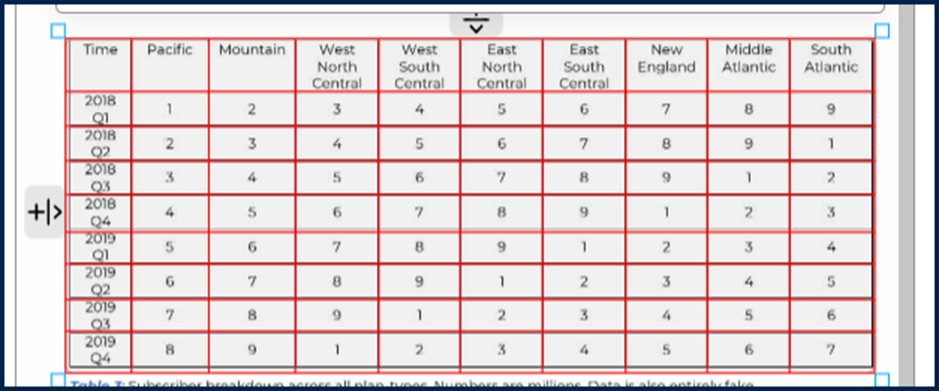
Columns can be added in the same way using the icon on the left side of the table, which shows a plus sign, a vertical line, and a leftward arrow.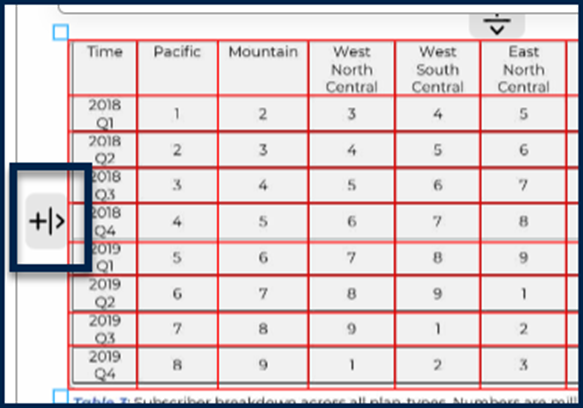
Removing extra rows or columns
If the table has more rows or columns than it should, do not merge them. Instead:
- Hover over the row or column line that should not be there.
- Click to select it. It will change from red to gray when selected.

- Press the Delete key on your keyboard.
Merging cells that are incorrectly split
If content that belongs in one cell is being split across two by an unexpected dividing line, deleting the line will affect the cells below it. Instead, merge the cells:
- Select the Table element and click the "Table" button in the toolbar to open the table toolbar.
- Click and hold in the first of the two cells that need to be merged, then drag to draw a box that covers both cells. Only select the cells you intend to merge. If you have two separate pairs of cells to merge, do each pair as its own step.

- Release the mouse. Both cells should now be highlighted.

- In the table toolbar, click "Merge."
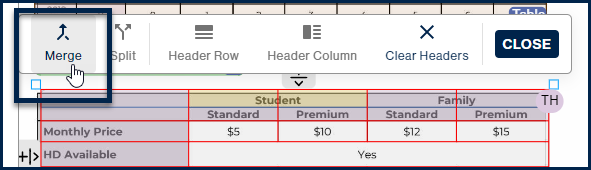
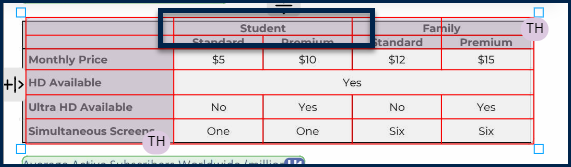
- The two cells will become one, while the column structure below is preserved.
Splitting a cell that is too large
If a cell spans more space than it should:
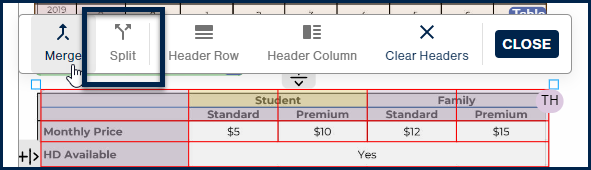
- Select the cell.
- In the table toolbar, click "Split."
Verification
After making your changes, open the Table toolbar again and review the table. The number of rows and columns should match what you see in the page view. Each cell should contain only the content it is supposed to, with no values split across multiple cells and no cells spanning further than they should.
Related Articles
Was this article helpful?
That’s Great!
Thank you for your feedback
Sorry! We couldn't be helpful
Thank you for your feedback
Feedback sent
We appreciate your effort and will try to fix the article