Product
Advanced Editor (Web-based CL PDF)
Feature
Document Tag
Overview
After the document has been remediated, users will need to add a Document tag to the project. Essentially, this conveys the information, “This is a full and complete document.” Doing this after remediation, but before the validation check is the most efficient order to complete this action.
Prerequisites
After you have checked and fixed the tags tree, add a document tag to the tags root before running your verification.
Steps to Follow
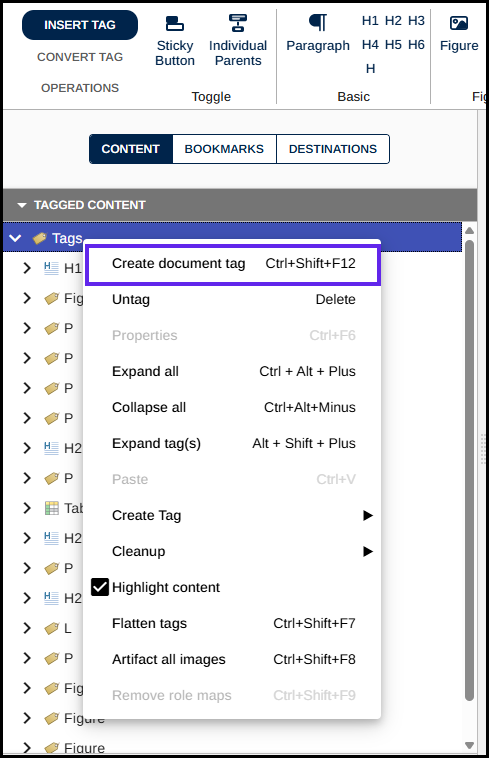
- Right-click (or otherwise open the context menu) on the Tags root
- Select the "Create Document Tag" option.
Screenshots
Was this article helpful?
That’s Great!
Thank you for your feedback
Sorry! We couldn't be helpful
Thank you for your feedback
Feedback sent
We appreciate your effort and will try to fix the article