Product
Simplified Editor (Web-based CL PDF)
Feature
Lists
Document Element
- List Item Identification
- List Level Correction
Issue
Lists are not being tagged accurately. This can happen in two ways: multiple items are grouped inside a single List Item when they should each have their own, or List Items are nested at the wrong level.
Symptom
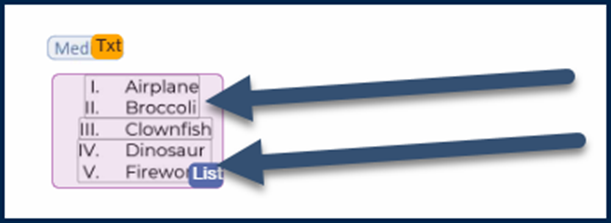
Grouped items:
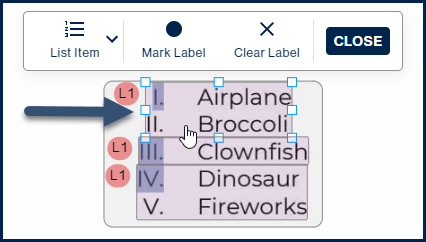
When you open the List element in the Simplified Editor, you can see that more than one piece of content is sitting inside a single List Item box. For example, "Airplane" and "Broccoli" appear together in one List Item instead of each having its own.
Wrong levels:
When you open the List element and click the List button in the toolbar, the level indicators on your List Items do not match the actual structure of the list. For example, items that should all be at the same level are showing as "L1" and "L2" mixed together.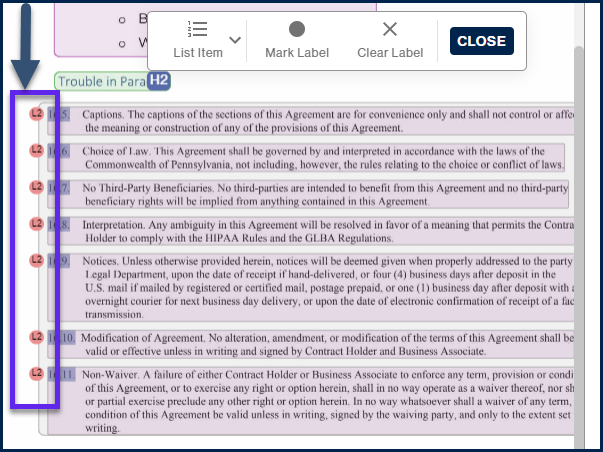
Causes
The Simplified Editor does its best to detect list structure automatically, but it does not always get it right. Items can end up grouped together if the spacing or formatting in the source document made them look like one block of content. Level issues can happen due to indentation issues, or for more specific reasons, like when labels contain numbers with decimal points, like "16.5," which the tool may interpret as a nested item rather than a top level one.
Affected Users
Screen reader users are most directly affected. A screen reader announces the number of items in a list before reading them. If items are grouped incorrectly, that count will be wrong, and content will be missed. If levels are wrong, the list structure will be announced incorrectly, which can be disorienting.
Resolution Steps
Fixing grouped List Items
- Click the List element.
- In the toolbar, click "List." A child toolbar will appear with options to edit List Items and mark or clear labels.
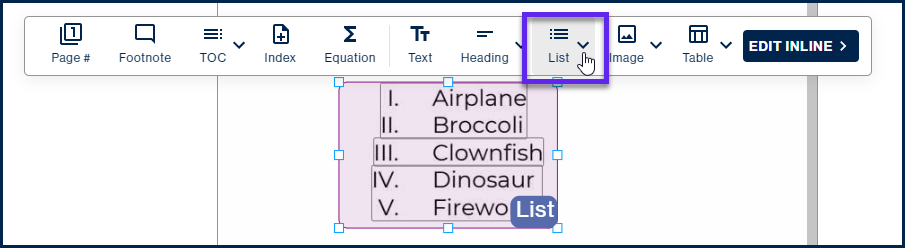
- In the page view, hover over the List Item that contains more than one item. Resize handles will appear.
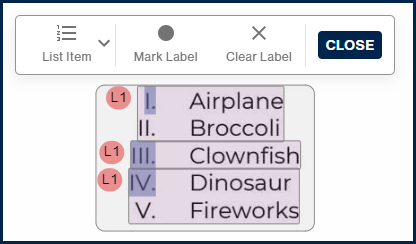
- Drag the bottom middle resize handle upward until the List Item contains only the first piece of content.
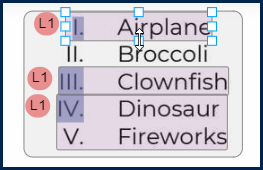
- Draw a box around the next piece of content to create a new List Item.
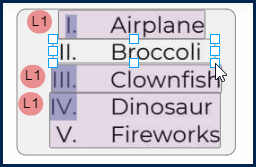
- When prompted, select the correct List Item level from the child toolbar. If all items are at the same level, choose "L1."
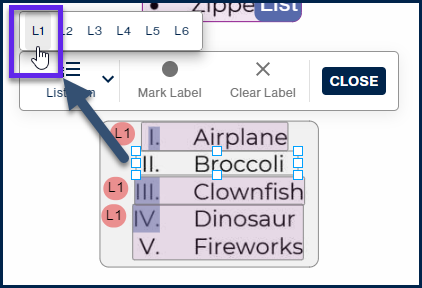
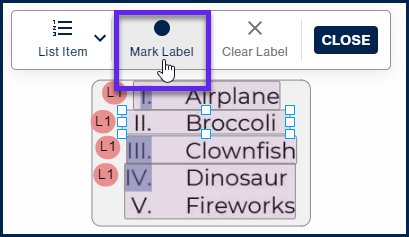
- Select the new List Item and click "Mark Label" in the toolbar.
- Draw a box around the label text in the page view to create the label.
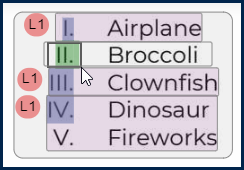
- Verify the new label is created correctly, then repeat for any other grouped items.
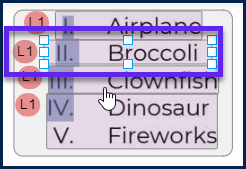
Important: always mark the label after creating a new List Item. It is easy to forget and will cause issues in the final output.
Fixing List Item levels
- Select the List element.
- In the toolbar, click "List." The child toolbar will open and level indicators will appear on each List Item in the page view.
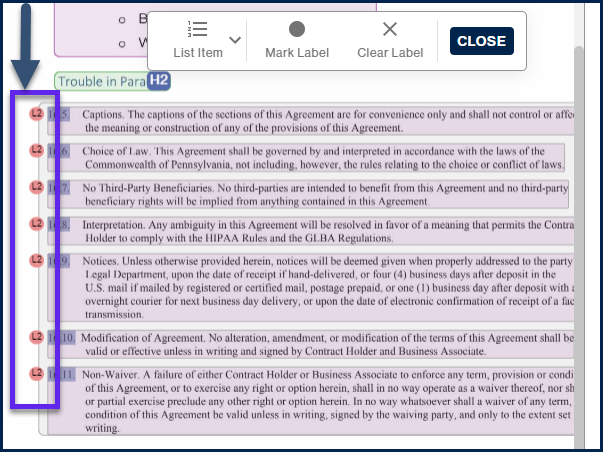
- Click the circle showing the level number on any item that is wrong. The level options will appear.
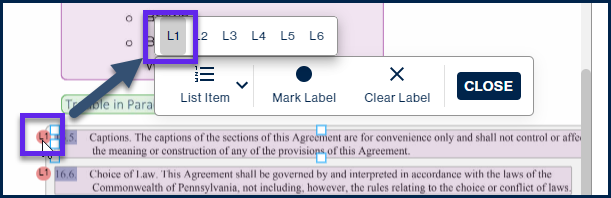
- Select the correct level.
- Repeat for any other List Items that need to be updated.
Verification
After making your changes, click the List button in the toolbar again and review the List Items in the page view. Each item should be in its own List Item box, and all level indicators should reflect the actual structure of your list. If you are working with a single-level, or non-nested list, all items should show the same level.
Related Articles
- How to Properly Mark Lists (Simplified Editor)
- How to Connect Separated List Elements (Simplified Editor)
Was this article helpful?
That’s Great!
Thank you for your feedback
Sorry! We couldn't be helpful
Thank you for your feedback
Feedback sent
We appreciate your effort and will try to fix the article