Product
Advanced Editor (Web-based CL PDF)
CommonLook PDF Desktop Version
Feature
Tagging
Document Element
Using Individual Parents (tagging several elements at once)
Overview
The Individual Parents tool lets you select every instance of a given selection type at once and insert the appropriate tags for all of them in a single action, instead of tagging each one individually.
For example, when manually tagging a list's bullets a more efficient approach is to select all of the bullet points at once, turn on Individual Parents, tag them as Label (Lbl) tags, and move on.
Prerequisites
- You're manually tagging a list (or any other repeated element) and want to create the same tag type for several elements at once instead of one at a time.
- Each instance you want to tag sits in its own separate text run in the physical view (each bullet, for example) — Individual Parents keeps each one in its own tag rather than merging them together.
Steps to Follow
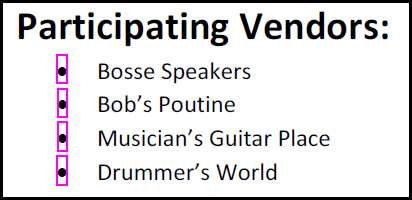
- In the physical view, draw a vertical box to highlight all of the bullets at once.
- In the Insert tag tab, click the button for “Individual Parents” (the second button from the left) and then click the Lbl button to create the label tags. Because each bullet is in its own text run, each bullet will be placed in its own Lbl tag. In addition to being visible in the Tags tree, all of the Lbl tags will be listed in the “Affected Elements” panel to the right of the physical view.
Note: If a user performed this function without slecting the "Individual Parents" button, all of the bullet points would be placed into one Lbl tag.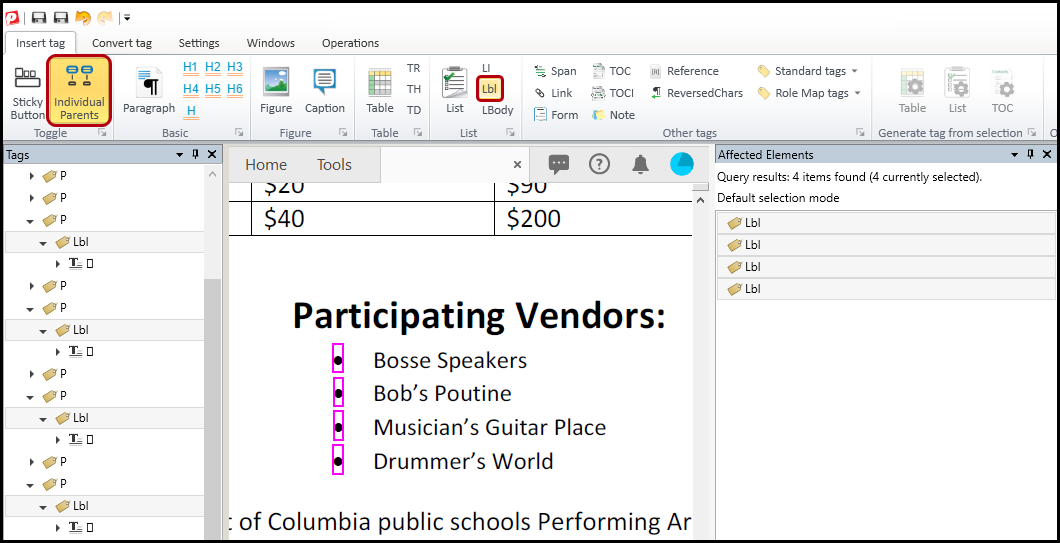
- “Level up” (Ctrl+P) the newly created Lbl tags, pushing them to the root level.
- Run a cleanup to get rid of any empty tags (if necessary).
- Click the “Individual Parents” button again to turn that feature off.
- Continue with the rest of the steps for tagging the list.
Common Problems
- Forgetting to click "Individual Parents" before tagging, which merges every selected instance into a single tag instead of one tag per instance.
- Leaving "Individual Parents" turned on after finishing, which can cause later tagging actions to behave unexpectedly.
- Skipping "Level up" after creating the tags, leaving them nested somewhere unintended instead of at the root level.
- Not running cleanup afterward, leaving empty tags behind in the Tags tree.
Frequently Asked Questions
What does the Individual Parents tool actually do?
It lets you select every instance of a given selection type at once and create the same tag type for each instance individually, instead of tagging one at a time.
What happens if I forget to turn on Individual Parents before tagging?
All of the selected elements get placed into a single tag together, rather than one tag per element.
Where can I see the tags Individual Parents just created?
They show up in the Tags tree, and are also listed together in the "Affected Elements" panel to the right of the physical view.
Do I need to turn Individual Parents off when I'm done?
Yes — click the Individual Parents button again to turn it off before continuing with other tagging tasks.
Is Individual Parents only useful for list bullets?
No — it works for any selection type where you want to tag several separate instances at once, though tagging list bullets as Lbl tags is a common use.
Was this article helpful?
That’s Great!
Thank you for your feedback
Sorry! We couldn't be helpful
Thank you for your feedback
Feedback sent
We appreciate your effort and will try to fix the article