Product
Advanced Editor (Web-based CL PDF)
Feature
Tables
Document Element
Data Tables
Overview
Data tables are used to share relationships between pieces of information. When tagged properly, assistive technology will announce that there's a table with a certain number of columns and rows, then associate the data with the correct headers. Tagging a data table accurately is the only way to make sure that information comes across clearly.
The recommended way to tag a data table is the Generate Tag from Selection feature, which lets CommonLook build the table's tags automatically based on your selection. Depending on how the original document was built, this is often accurate right away, but you should always check the result for mistakes afterward.
Prerequisites
Before you begin, make sure you have:
- Confirmed that the table in question is a data table, not a presentation table. See "How to Determine Table Types in the Advanced Editor" if you haven't made that determination yet.
- Access to the physical view of the document and the Insert Tag tab.
Steps to Follow
Generate the table
- In the physical view of the document, highlight the table.
- In the Insert Tag tab, on the far right side, find the Generate Tag from the selection group and click Table.
Be sure to use the button on the right side of the Insert Tag tab, as shown in the screenshot below. There's a different Table button on the left side of the tab used for manual tagging. Using the Table button in the Generate tag from selection group creates the Table tag along with the tags inside it, like table rows and data cells.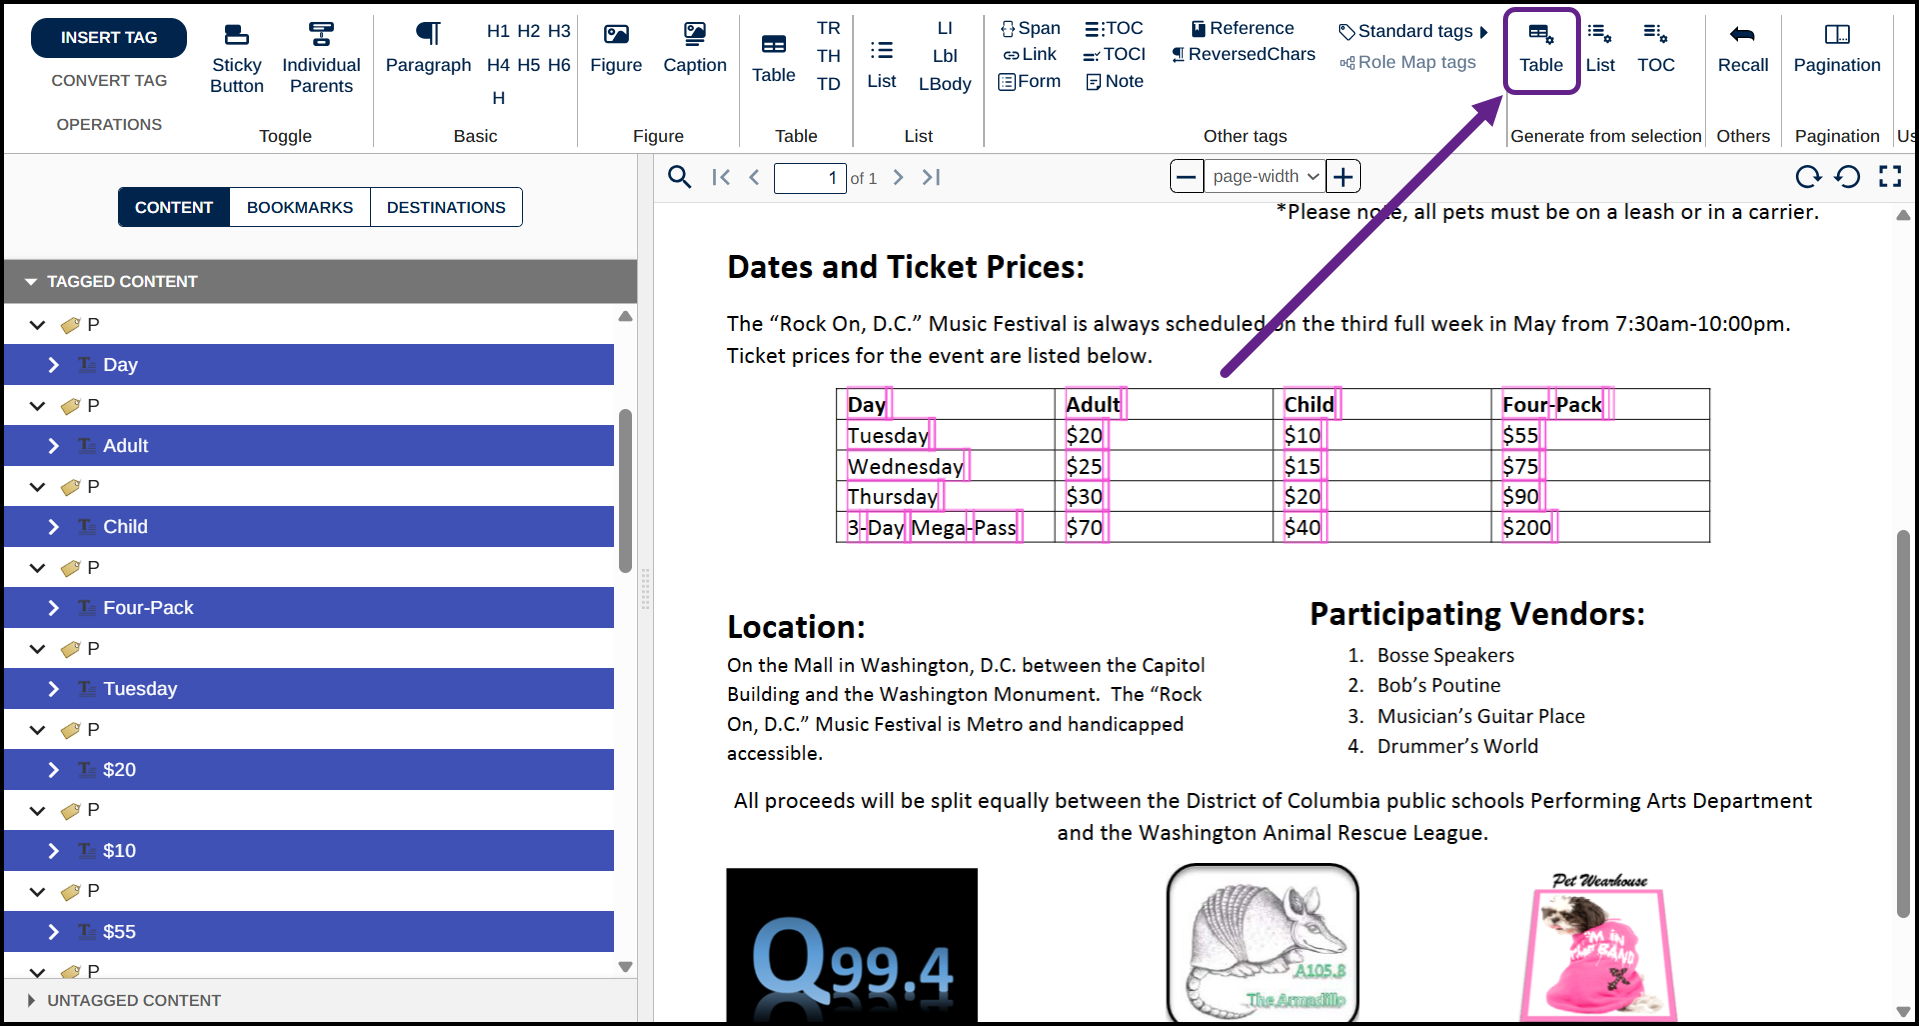
- Make sure the new Table tag is in the correct reading order in the Tags tree. Use Level Up (Ctrl+Alt+P) as needed to move it to the root level.
- Clean up any empty tags left behind after creating the table. See "How to Clean Up Empty Tags in the Advanced Editor" if you need help with this.
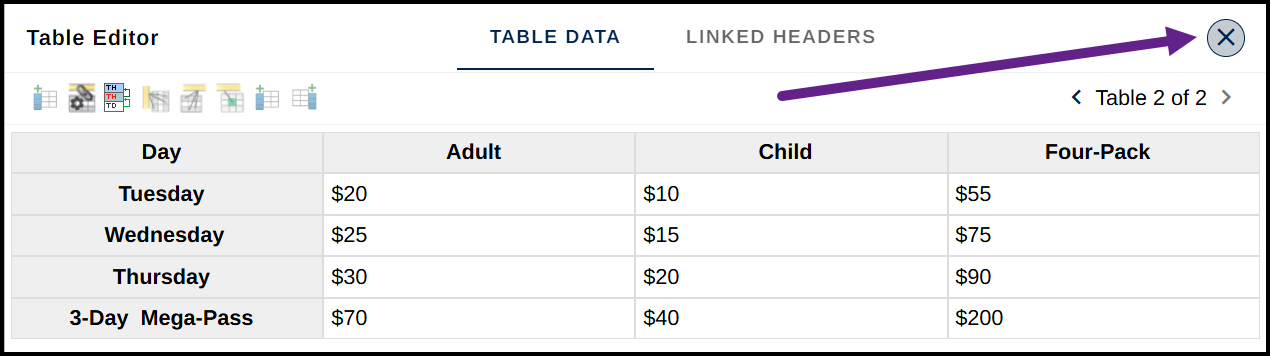
- Right-click, or otherwise open the context menu, on the Table tag and select Show table editor. Verify and correct the following:
- Table and cell layout. See "How to Correct a Generated Table in the Advanced Editor" for more on adjusting cell and table layout.
- Header cells and their scope. See "How to Correct a Generated Table in the Advanced Editor" for more on tagging header cells and assigning scope.
- When you're finished working in the Table Editor, select the X in its upper right corner to close it.
Frequently Asked Questions
What if Generate Tag from Selection doesn't create an accurate table?
Open the Table Editor to review and correct the table and cell layout, and confirm the header cells have the correct scope. See "How to Correct a Generated Table in the Advanced Editor" for detailed steps.
Why do I need to check the result if CommonLook generates the table automatically?
Table construction varies across documents, so the generated tags don't always come out perfectly. Always review the result in the Table Editor before moving on.
What's the difference between the Table button used here and the other Table button in the Insert Tag tab?
The Table button in the Generate tag from selection group builds the full table structure, including rows and data cells, from your selection automatically. The other Table button is used for manual tagging, where each part of the table is built individually.
Do I still need to clean up empty tags after generating a table?
Yes. Generating a table can sometimes leave empty tags behind. See "How to Clean Up Empty Tags in the Advanced Editor" for how to find and remove them.
Was this article helpful?
That’s Great!
Thank you for your feedback
Sorry! We couldn't be helpful
Thank you for your feedback
Feedback sent
We appreciate your effort and will try to fix the article